S'mores Ice Cream Cake
This ice cream cake is so delicious, with layers of graham cracker crumbs, chocolate and vanilla ice cream, and a toasty meringue top. I like to serve it in very thin pieces, as less is more for this dessert. Use storebought ice cream to make things very easy!
Ingredients
Instructions
Adjust an oven rack to the middle position. Preheat the oven to 325°F. Line a baking sheet with parchment paper and line a Pullman pan with a parchment sling. (You can also use a 9-inch loaf pan, but you will need to use less ice cream.)
In a medium bowl stir the graham cracker crumbs and sugar to combine. Add the melted butter and stir until evenly coated. Transfer the crumbs to the prepared baking sheet and spread them evenly across the parchment paper. Bake 8 to 10 minutes, until the crumbs are golden brown and fragrant.
Transfer the pan to a wire rack and let cool completely.
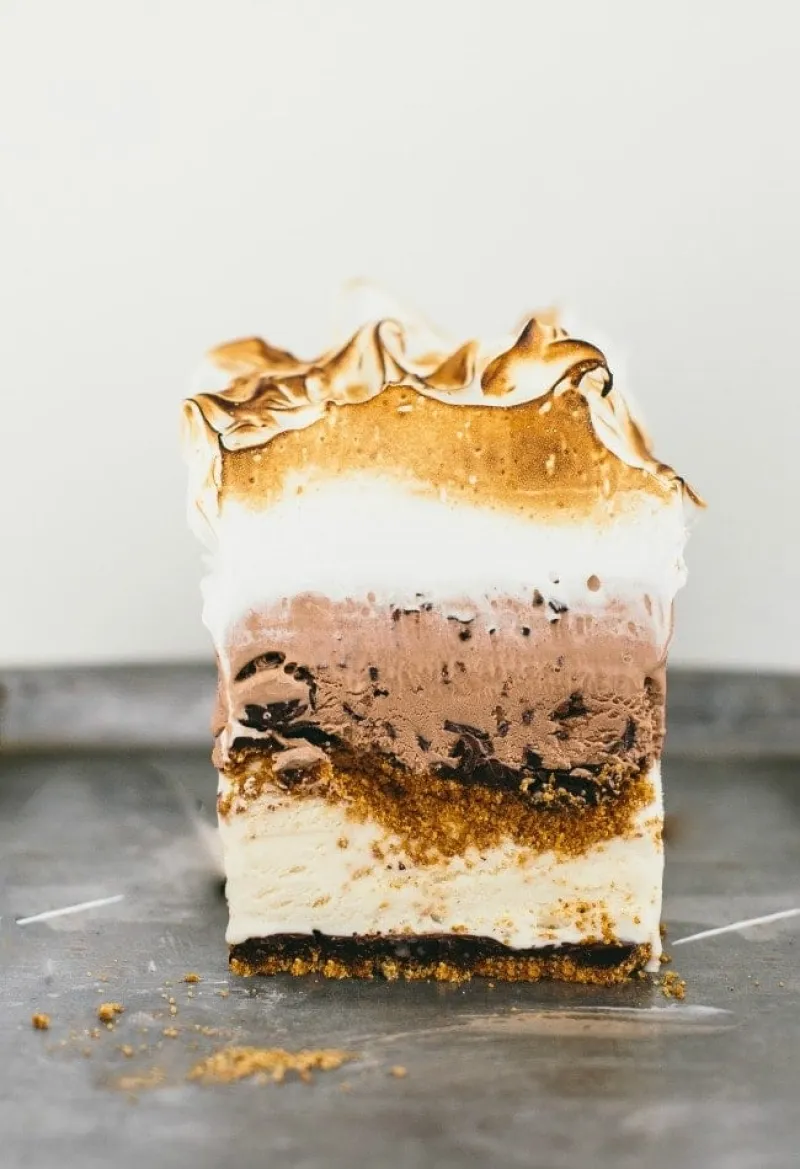
Use a measuring cup or spoon to press 1 cup (100 g) cooled crumbs evenly on bottom of the prepared Pullman pan or loaf pan. Top with the Vanilla Ice Cream, pressing it into an even layer. Sprinkle the remaining crumbs evenly over the ice cream and top with the Chocolate Ice Cream. Place the ice cream cake in the freezer and freeze for at least 6 hours or overnight before topping with meringue.
FOR THE MERINGUE TOPPING: Put about an inch of water in a medium saucepan and bring it to a gentle boil.
In the bowl of a stand mixer, stir the egg whites, sugar, and salt to combine. Place the bowl over the saucepan, being careful not to let the water touch the bottom of the bowl. Stir with a rubber spatula until the sugar is completely melted and reaches a temperature of 160°F, 4 to 5 minutes. While you are stirring, be sure to scrape down the sides of the bowl with the spatula—this will ensure no sugar grains are lurking on the sides and also help prevent the egg whites from cooking.
Want to see how it turns out?
We've hidden the final 3 steps to support the original creator. Get the full, complete instructions directly from their site!
Continue Reading at Thevanillabeanblog →


Comments & Photos
Be the first to share your thoughts!
Did you make this recipe?
Leave a Comment